Firefox Sync Server and Apache as a proxy

Life sometimes is like ping pong.

  • Firefox sync is such a great feature. ping
  • But it’s worrisome to store all your passwords to someone’s else machine. pong
  • There is the syncserver. It’s opensource! You can run it in your premises. ping
  • But it is a python2 project. It may be a problem some day. pong (sort of)
  • Who cares about python3. It has this WSGI thingy and we can plug it to a public apache with a nice SSL and be done with it. ping (almost)

5 years later

  • Looks like distribution support for python2 is fading. There is still python2 but we cannot run it in the public apache because it runs a host of other things that require python 3 WSGI. pong
  • Told you so. double pong
  • Ok. Don’t panic. How difficult would be to port it to python3? ping?
  • From the looks of #179 and #165 that isn’t going to happen. Syncserver was not part of Mozilla infrastructure and there is a Rust port underway which of course is not ready for general consumption yet. pong

So what options do we have? If we run it with

make serve

it starts a server a localhost:5000. Maybe we could proxy from our public apache.

Unfortunately all guides I could find was about setting nginx as reverse proxy or with apache + mod_wsgi but nothing about apache as a reverse proxy for syncserver. Given the vast options of apache configuration that was a suprise. I mean: is it even possible to find something that cannot be done with apache configuration?

Indeed after extensive search and experimentation I found the combination of options that form the solution. The specific options are more or less mentioned at https://github.com/mozilla-services/syncserver/issues/131 but I will try to make them more clear and explicit. So here are the non obvious configuration settings.

syncserver.ini

Below is the diff of syncserver.ini that works for me.

diff --git a/syncserver.ini b/syncserver.ini
index ccf1ae0..edb1763 100644
--- a/syncserver.ini
+++ b/syncserver.ini
@@ -11,7 +11,7 @@ use = egg:syncserver
[syncserver]
# This must be edited to point to the public URL of your server,
# i.e. the URL as seen by Firefox.
-public_url = http://localhost:5000/
+public_url = https://www.my-public-address.org/

# By default, syncserver will accept identity assertions issued by
# any BrowserID issuer.  The line below restricts it to accept assertions
@@ -21,7 +21,7 @@ identity_provider = https://accounts.firefox.com/

# This defines the database in which to store all server data.
#sqluri = sqlite:////tmp/syncserver.db
-#sqluri = pymysql://sample_user:sample_password@127.0.0.1/syncstorage
+sqluri = pymysql://sync-user:sync-password@localhost:3306/syncserver

# This is a secret key used for signing authentication tokens.
# It should be long and randomly-generated.
@@ -30,7 +30,7 @@ identity_provider = https://accounts.firefox.com/
#    head -c 20 /dev/urandom | sha1sum
#
# If not specified then the server will generate a temporary one at startup.
-#secret = INSERT_SECRET_KEY_HERE
+secret = SECRET_KEY

# Set this to "false" to disable new-user signups on the server.
# Only requests by existing accounts will be honoured.
@@ -56,3 +56,4 @@ force_wsgi_environ = false

# "{node}/1.5/{uid}"
# sync-1.5 = "http://localhost:8000/1.5/{uid}"
+sync-1.5 = "https://www.my-public-address.org/storage/1.5/{uid}"   #<-----------This is the trick no 1

The first trick is to specify the storage server because it is not calculated properly from the public address. Probably the authors have provisions to host the storage server to a different machine but that just complicate things. If you open firefox’s about:sync-log you will notice that it tries to access localhost:5000 after the initial handshake and it fails if your firefox runs in a different machine from the sync server.

Here is the relevant bit from the apache configuration.

<VirtualHost *:80>
        ServerName www.my-public-address.org
        Redirect / https://www.my-public-address.org/
</VirtualHost>

<VirtualHost *:443>
        #SSLProxyEngine On
        ServerName www.my-public-address.org

        SSLEngine On
        SSLProtocol all -SSLv2
        SSLCipherSuite ALL:!ADH:!EXPORT:!SSLv2:RC4+RSA:+HIGH:+MEDIUM
        SSLCertificateFile /etc/letsencrypt/live/www.my-public-address.org/cert.pem
        SSLCertificateKeyFile /etc/letsencrypt/live/www.my-public-address.org/privkey.pem
        SSLCertificateChainFile /etc/letsencrypt/live/www.my-public-address.org/chain.pem

        CustomLog /var/log/apache2/access_sync.log combined
        ErrorLog /var/log/apache2/error_sync.log
        LogLevel info

        ProxyPreserveHost On                          # <-- This is the trick no 2
        RequestHeader set X-Forwarded-Proto "https"   # <-- This is the trick no 3
        ProxyPass / http://localhost:5000/
        ProxyPassReverse / http://localhost:5000/
</VirtualHost>
  • The second trick is to preserve the public host name address in HTTP headers that go to the syncserver with the ProxyPreserveHost directive.
  • The third trick is to respect the https protocol when we proxy from https to http

Without the above two trick the proxying is not working and firefox cannot sync.

And after that what? Are we going to run make serve every time we reboot the apache machine?

Let’s wrap it in a systemd service. Here is the service file located at /etc/systemd/system/sync.service

[Unit]
Description=Start firefox syncserver
After=network.target

[Service]
Restart=always
RestartSec=1
User=www-data
WorkingDirectory=/var/www-ssl/syncserver
ExecStart=make serve

[Install]
WantedBy=multi-user.target

Run the command below in order to enable the service to run on boot.

systemctl enable sync

Run the command below to start the service immediately.

systemctl start sync

Hope that helps.

References

GNU Make function arguments with comma?

Contrary to the Betteridge’s law of headlines that states “Any headline that ends in a question mark can be answered by the word no” we can answer this with a definitely yes: we can have comma in Make argument’s functions albeit with some ceremony…

But fist some background. Make is a build tool that its origins are lost in the mists of time (1976). Make is a graph dependency resolver, probably the first of its kind. GNU Make is the GNU re-implementation that is obviously on steroids while it has bitten by a radioactive spider in the same time. It has loads of features such:

  • 3 different ways to assign variables
  • a way to make shell invocations persistent (per target) via the .ONESHELL directive that effectively taps to Bourne Shell in order to extend Make with a scripting language creating a 4th level set of variables. This also gives an opportunity to everybody to loose their innocence and become artists in escaping and quoting stuff that comes and goes around between the shell and Make.
  • user defined functions that are essentially macros like m4 or C preprocessor macros.

All these features create a very useful conglomerate of tools and a massive footgun.

Let’s concentrate on the user defined functions. They are supposed to be Makefile blocks that look like this:

define my_function
        @echo "Hello $(1). It's time to say $(2).";
endef

and can be invoked with another builtin function named call like this:

all:
        $(call my_function,world,bye)

Make will perform all expansions and replace the function body at the callsite. Notice that there is no space around commas because space is important in the Make-speak that is the Makefile. Furthermore the arguments are positional and referenced with their index. So it is considered a good idea to write some documentation before the function body.

Anyway this should output:

Hello world. It's time to say bye.

What we want is to pass an argument that contains one or more commas. Let’s say we want to call it with bye,bye as the second argument so the output should be:

Hello world. It's time to say bye,bye.

Obviously calling like below it won’t work because the second bye looks like just a third argument.

$(call my_function,world,bye,bye)

Let’s just charge into the problem. How about this?

$(call my_function,world,"bye,bye")

The output is:

/bin/sh: 1: Syntax error: Unterminated quoted string
make: *** [Makefile:6: all] Error 2

Aah ok, we are using double quotes in the echo above. How about single quotes?

$(call my_function,world,'bye,bye')

Well I grant you that you have use a shell at least one time in your life before and that your thinking is somewhat logical. Here is the output of the above:

Hello world. It's time to say 'bye.

Huh? Time for some reading to understand what’s going on. Look at [1], [2] and [3]. Apparently this is the Make world and shell quoting rules do not apply. The rules are simple though

  • Commas are argument separators
  • You can quote or group with parenthesis

Ok then. How about this?

$(call my_function,world,(bye,bye))

Well it gives that:

Hello world. It's time to say (bye,bye).

-Oh come on!

-Well yes, my point exactly.

-Ok. How about string functions so we can get rid of the parenthesis in the function body?

Looks like that this is more difficult than it sounds.

  • There is no substring function.
  • There is the subst function but it is not greedy. This means that is good for substituting the left (first) but not the right (last) parenthesis. That means that if you have also parenthesis besides commas (and who wouldn’t?) in your argument you are basically toast. If it was greedy it would be good for the last but not for the first parenthesis. The worst possible scenario is the Make to grow the syntax to support greedy vs non greedy behavior.

So the solution is to use shell tools that have sufficiently text power to strip the parenthesis. Here is an implementation that utilizes sed. So without further ado:

define my_function
       echo "Hello $(1). It's time to say `echo \"$(2)\" | sed -e 's/^(\|)$$//g'`.";
endef

all:
       @$(call my_function,world,(bye,bye and (bye)))

and the output is:

Hello world. It's time to say bye,bye and (bye).

Basically you are supposed to change the variable $(2) with

`echo \"$(2)\" | sed -e 's/^(\|)$$//g'`

The code above handles inside parenthesis also. It may look ugly and complicated but remember it is best to sacrifice function’s convenience for caller’s convenience.

Hope that helps.

References

  1. https://blog.jgc.org/2007/06/escaping-comma-and-space-in-gnu-make.html
  2. https://www.cmcrossroads.com/article/gnu-make-escaping-walk-wild-side
  3. https://stackoverflow.com/questions/55805809/how-to-pass-comma-character-in-makefile-function
  4. Image from https://commons.wikimedia.org/wiki/File:Makefile-graph.png

After reading the above you will feel enlightened, humbled and less confident.

APC Back-UPS RS 1000 not charging & RS 800 overload: A two birds with one stone story.

My APC Back-UPS RS 800 was sitting, in non working condition (batteries and inverter were hanging out) under my desk for several months to my wife’s dismay. After a power failure a APC Back-UPS RS 1000 from work died too. I promised to take look hoping for the easy fix.

Having two UPS under my desk for a prolonged time wasn’t going to fly and I promised that I will give a quick try to both and I will get rid of them one way or the other.in

Disclaimer

I don’t have an electronics background although I am a physicist. Listening to me discussing my findings or theorizing about circuits is analogous of listening a blind guy discussing about great paintings.

Furthermore fiddling with UPS internals is dangerous due to high wattage (due to battery) even when the UPS is turned off or disconnected from the main power.

You have been warned!

Background

First of all the 2 UPS had different failure modes. The RS 800 had the dreaded overload problem with no load while the RS 1000 was entering battery mode and was not charging even when it was connected to the main power.

Googling around I found some info so I think it is best to gather it around.

APC Back-UPS RS 800

APC Back-UPS RS 1000

Long shot

First I opened the new APC RS 1000. I couldn’t find any obvious culprit so I close it again.

Next week I opened my APC RS 800 determined to employ the wealth of info commenters had offered. Specifically I decided to follow the advice in the comment section by @gentissi.

  • First fix was to change 2 capacitors: C56, C60 – Worked the first time!
  • Second fix was to change: C71 – Worked the second time!
  • Third fix was to change: C40 and lo and behold it worked. WOW! Worked the third time!

The nice people at https://www.mikrocontroller.net/topic/462158 also mentioned to replace the rectifiers Q1, Q2, Q3 and Q4. Here is the replacement: https://www.mikrocontroller.net/part/IRF740. However this fix is much more difficult than changing the capacitors and anyway I didn’t need it anymore since the UPS started working after I changed C40.

Armed with confidence with my unexpected success I decided to look again at the RS 1000. By looking at the schematics I realized that the two UPS were sharing some components although the physical layout of the boards were quite different. Here is the RS-1000 board:

More specifically:

RS 800RS 1000
C56C40
C60C41
C71C4 – empty base
C40 5V supportNo equivalent
No equivalentC3
C15C19 – micro-controller
C69C87 -empty
Mapping of capacitors names between RS 800 and RS 1000

Taking a wild guess I hunted down all 22uf capacitors in the schematics. C3 was one that had no equivalent in the RS 800. However it was in the vicinity of the C40 and C41 and I replaced it anyway.

  • Some capacitors were non existent like C40 equivalent.
  • Some had their base ready in the board but it was left empty like C4 and C87. You can see the C4 empty base in the picture below.
  • Some were innocent like C19 that lives in the micro-controller circuit that drives the main button.

So after changing the C3, C40 and C41 with 50V 22uF I got RS 1000 back up and running. WOW!

A close up of the guilty parts. Look how C41 (next to C40) is a normal electrolytic capacitor instead of SMD. If afterthought was a picture then that looks like it. It is like this also in the video link I provided.

Hope that helps somebody. Please if you make this fix and works for you drop a comment so other people can assess the usefulness of the tip.

HP 250 G5 Notebook firmware update without Windows, using WINE instead

How to update the firmware in HP laptop without Windows using WINE instead.

Finally my wife’s old trusty Acer Aspire 5738G broke after 7 years. The mode of failure was strange. Computer stops during windows startup – no power down, the screen turns off and it doesn’t respond. This is old news you may say. The Internet and YouTube are full of laptops that stop during Windows startup. However this one stops after ~30sec even when in BIOS setup. In BIOS setup one could notice some artifacts in the screen from failed redraws and then it would stop responding at all. I suspected the memory, but I was able to reproduce it with each one of the DIMM modules. I can’t believe that the two DIMM module broke at the same time. I have never seen a failure in the memory controller before so finally I believe the problem is on ATI mobility graphics card. This can explain the screen artifacts and the eventual halt. A reflow may revive the laptop but for how long?

Naturally I was assigned the task to buy a new laptop, install the OS and backup restore from the old hard disk.

I found this laptop HP 250 G5 X0P62EA in a very good price. It is an i3 machine with 8GB of memory and Intel video card. Sadly it comes with a 1TB hard disk. It’s a pity that HP doesn’t ship it with SSD. The laptop comes without Windows but with FreeDos instead. Buying strategy thought: “Hey – they wouldn’t ship it without Windows if it can’t run Linux in a proper and satisfactory manner? Would they?”

Indeed the Debian/GNU Linux unstable installation was a breeze. Everything worked out of the box. And when I am saying everything I mean everything. You name it: UEFI boot non legacy mode, audio, webcam, ethernet, wifi, video. At some point the kernel complained about missing firmwares but I was able to find all requested files in Debian provided packages.

And then when I was nearly completing my task I thought to check about firmware updates from HP. That thought alone simply cost me the better part of my weekend.

Looking at the HP site at https://support.hp.com/ca-en/drivers/selfservice/hp-250-g5-notebook-pc/10180321 for this model it says no update.

-Good we are finished. Let’s get out of here.

-Wait there is an OS selector combobox. There is only two options: Windows 10 and 7.

-These are driver updates for Windows. I don’t need them. Let’s get out of here.

-Let’s see what happens if I select it… Oh look! There are two firmware updates, one for the BIOS and one for the HDD.

-Damn!!!,

-Here there are. Install them.

Note: your mileage may vary but I am confident that you will be able to escape many hours by following the advice in this blog.

HP provides software packs or softpacks. They are executables that have the following form in their filenames: SP[number].exe. So how do we run them without a machine with Windows?

First things first: let’s examine them.

$file sp81514.exe
sp81514.exe: PE32 executable (GUI) Intel 80386, for MS Windows, InstallShield self-extracting archive

Bingo! Let’s extract it.

$ unzip sp81514.exe 
Archive: sp81514.exe
 End-of-central-directory signature not found. Either this file is not
 a zipfile, or it constitutes one disk of a multi-part archive. In the
 latter case the central directory and zipfile comment will be found on
 the last disk(s) of this archive.
unzip: cannot find zipfile directory in one of sp81514.exe or
 sp81514.exe.zip, and cannot find sp81514.exe.ZIP, period.

Oups! Let’s try again.

$sudo apt-get install p7zip-full
$7z e sp81514.exe
... blah blah....
$ls
Insydeflash.exe sp81514.exe

Insydeflash.exe eh?

$ file Insydeflash.exe
Insydeflash.exe: MS-DOS executable, COFF for MS-DOS, DJGPP go32 DOS extender

DJGPP go32 DOS extender? My God I am old! I know what it is and what it means. I am feeling lucky though…

$ 7z e Insydeflash.exe
... blah blah....
$ ls
-rw-r--r-- 1 bill bill 9177600 Jun 29 11:47 081EC.bin
-rw-r--r-- 1 bill bill 9177600 Jul 10 09:41 081ED.bin
-rw-r--r-- 1 bill bill 9177600 Jul 11 11:10 081EF.bin
-rw-r--r-- 1 bill bill 9177600 Jun 28 06:04 081F2.bin
-rw-r--r-- 1 bill bill 9177600 Jul 11 10:26 081F3.bin
drwx------ 2 bill bill 4096 May 10 10:13 CrisisFolder
-rw-r--r-- 1 bill bill 261120 Feb 10 2017 CrisisKeyDLL.dll
-rw-r--r-- 1 bill bill 259072 Apr 21 2016 CryptRSA32.efi
-rw-r--r-- 1 bill bill 443904 Apr 21 2016 CryptRSA.efi
-rw-r--r-- 1 bill bill 195584 Mar 25 2013 FlsHookDll.dll
-rw-r--r-- 1 bill bill 231936 Mar 25 2013 FlsHook.exe
-rw-r--r-- 1 bill bill 944664 Nov 4 2010 FWUpdLcl.exe
-rw-r--r-- 1 bill bill 1355632 Apr 22 2016 HpBiosMgmt.efi
-rw-r--r-- 1 bill bill 256 Apr 22 2016 HpBiosMgmt.s09
-rw-r--r-- 1 bill bill 256 Apr 22 2016 HpBiosMgmt.s12
-rw-r--r-- 1 bill bill 256 Apr 22 2016 HpBiosMgmt.s14
-rw-r--r-- 1 bill bill 1355640 Apr 22 2016 HpBiosUpdate.efi
-rw-r--r-- 1 bill bill 256 Apr 22 2016 HpBiosUpdate.s09
-rw-r--r-- 1 bill bill 256 Apr 22 2016 HpBiosUpdate.s12
-rw-r--r-- 1 bill bill 256 Apr 22 2016 HpBiosUpdate.s14
-rw-r--r-- 1 bill bill 30135717 Jul 12 14:57 Insydeflash.exe
-rw-r--r-- 1 bill bill 918528 Apr 10 05:09 InsydeFlash.exe
-rw-r--r-- 1 bill bill 1763840 Apr 10 05:08 iscflash.dll
-rw-r--r-- 1 bill bill 54984 May 13 2016 iscflash.sys
-rw-r--r-- 1 bill bill 63432 May 13 2016 iscflashx64.sys
-rw-r--r-- 1 bill bill 34716 Jun 28 06:01 platform.ini
-rw-r--r-- 1 bill bill 30250664 Aug 16 00:01 sp81514.exe

Good!!! We have the firmware in multiple versions! Huh? Hold your horses . The 0x81*.BIN files are not version indicators. They are motherboard indicators. My laptop is 081EF.bin.

OK… but now we have the firmware. Let’s flash it. Not so fast! HP BIOS does not offer the facility to flash the BIOS. There is no DOS flash tool as I was used too all these years. How on earth am I going to flash it?

Note: Adding salt to the injury this was not the real firmware but I didn’t know it at the time. Real firmware is extracted from that file along with a signature file.

Look there is this file name HpBiosUpdate.efi. This looks helpful. Oh it is an EFI binary. How can we run EFI binaries?

  1. From the shell which does not exist or
  2. by chainloading from GRUB https://unix.stackexchange.com/questions/277373/is-it-possible-to-use-grub-to-run-an-efi-binary.

I followed the instructions it and chainload it. Actually you don’t need to do that. You can boot into it from the BIOS by pressing F9 and selecting the USB disk where the binary resides. It is failed in both cases but it created a log in the file HpBiosUpdate.log.

2015-01-01 00:08:06 EFI HP BIOS Update 3.6.4.r31880 Started
2015-01-01 00:08:06 System ID: 81EF
2015-01-01 00:08:07 Failed Loading HP BIOS Image Interface Protocol (Not Found)
2015-01-01 00:08:07 Failed Loading HP BIOS Image Interface Protocol

and in Debug log

2015-01-01 00:08:04 [W]> [EfiUtilityLib.c:InitializeEfiUtilityLib:218] LocateProtocol(EFI_SHELL_PROTOCOL'6302D008-7F9B-4F30-87AC-60C9FEF5DA4E', NULL, 0x8A897CB8) returned 'Not Found'. 
2015-01-01 00:08:04 [L]> EFI_DECOMPRESS_PROTOCOL'D8117CFE-94A6-11D4-9A3A-0090273FC14D' (ProtocolPtr = 0x89462980) is found. 
2015-01-01 00:08:04 [L]> EFI_LOADED_IMAGE_PROTOCOL'5B1B31A1-9562-11D2-8E3F-00A0C969723B' (ProtocolPtr = 0x8D6B4840) for current image (ImgHandle = 0x8D623698) is found. 
2015-01-01 00:08:04 [L]> EFI_DEVICE_PATH_PROTOCOL'09576E91-6D3F-11D2-8E39-00A0C969723B' (ProtocolPtr = 0x8D446018) for current device (DevHandle = 0x8D446298) is found. 
2015-01-01 00:08:04 [L]> EFI_SIMPLE_FILE_SYSTEM_PROTOCOL'964E5B22-6459-11D2-8E39-00A0C969723B' (ProtocolPtr = 0x8D7DF030) for current device (DevHandle = 0x8D446298) is found. 
2015-01-01 00:08:04 [L]> Executable Directory '\Hewlett-Packard\BIOSUpdate\'. 
2015-01-01 00:08:04 [L]> Current Working Directory '\Hewlett-Packard\BIOSUpdate\'. 
2015-01-01 00:08:04 [W]> [FileIo.c:InitializeFileIO:353] Cannot get debug log path system environment variable 'DEBUGLOGPATH'. (Not Found) 
2015-01-01 00:08:04 [L]> Initial Log File '\Hewlett-Packard\BIOSUpdate\Debug.log'. 
2015-01-01 00:08:05 [L]> Environment Variable 'HP_DTD_UEFI_LOG_TO_CONSOLE' Not Found. (Not Found) 
2015-01-01 00:08:05 [L]> Environment Variable 'HP_DTD_UEFI_LOG_TO_DEBUGLOG' Not Found. (Not Found) 
2015-01-01 00:08:05 [L]> Environment Variable 'HP_DTD_UEFI_PROMPT_TO_CONSOLE' Not Found. (Not Found)
2015-01-01 00:08:05 [L]> Environment Variable 'HP_DTD_UEFI_PROMPT_TO_DEBUGLOG' Not Found. (Not Found)
2015-01-01 00:08:05 [L]> Environment Variable 'HP_DTD_UEFI_ERROR_TO_CONSOLE' Not Found. (Not Found)
2015-01-01 00:08:05 [L]> Environment Variable 'HP_DTD_UEFI_ERROR_TO_DEBUGLOG' Not Found. (Not Found)
2015-01-01 00:08:05 [L]> Environment Variable 'HP_DTD_UEFI_WARN_TO_CONSOLE' Not Found. (Not Found)
2015-01-01 00:08:05 [L]> Environment Variable 'HP_DTD_UEFI_WARN_TO_DEBUGLOG' Not Found. (Not Found)
2015-01-01 00:08:06 [L]> Environment Variable 'HP_DTD_UEFI_DEBUG_TO_CONSOLE' Not Found. (Not Found)
2015-01-01 00:08:06 [L]> Environment Variable 'HP_DTD_UEFI_DEBUG_TO_DEBUGLOG' Not Found. (Not Found)
2015-01-01 00:08:06 [L]> StdErr is non-NULL, StdErr is used for Error/Warning message to console.
2015-01-01 00:08:06 [L]> EFI_CPU_IO_PROTOCOL'B0732526-38C8-4B40-8877-61C7B06AAC45' (ProtocolPtr = 0x9BA85280) is found.
2015-01-01 00:08:06 [L]> EFI_CPU_IO2_PROTOCOL'AD61F191-AE5F-4C0E-B9FA-E869D288C64F' (ProtocolPtr = 0x9B875280) is found.
2015-01-01 00:08:06 [L]> EFI_UNICODE_COLLATION_PROTOCOL'1D85CD7F-F43D-11D2-9A0C-0090273FC14D' (ProtocolPtr = 0x9B6823C0) is found.
2015-01-01 00:08:06 [W]> [EfiUtilityLib.c:InitializeEfiUtilityLib:537] LocateProtocol(EFI_SHELL_ENVIRONMENT2'47C7B221-C42A-11D2-8E57-00A0C969723B', NULL, 0x8A897CA8) returned 'Not Found'.
2015-01-01 00:08:06 [W]> [EfiUtilityLib.c:InitializeEfiUtilityLib:557] OpenProtocol(0x8D623698, EFI_SHELL_PARAMETERS_PROTOCOL'752F3136-4E16-4FDC-A22A-E5F46812F4CA', 0x8A897CB0, 0x8D623698, NULL, EFI_OPEN_PROTOCOL_GET_PROTOCOL) returned 'Unsupported'.

OK we need a little education. What’s going in here? What are these protocols?

Wikipedia first: https://en.wikipedia.org/wiki/Unified_Extensible_Firmware_Interface

EFI defines protocols as a set of software interfaces used for communication between two binary modules. All EFI drivers must provide services to others via protocols.

So protocols are library entry points. All these just to tell me “library not found” in a new and incomprehensible way?

Time for Google now. Here are the findings.

  1. There is a procedure to firmware upgrade. You are supposed to start the computer with a specially crafted USB stick while pressing Win+b (or Win+v which leads to CMOS error and ubootable system in my case). Here you can find the HP documentation https://support.hp.com/ca-en/document/c00042629 There is even a section named “Updating the BIOS when Windows does not start (Windows 10, 8, 7)”
  2. HP support forums are full of desperate people looking a way to update their BIOS without Windows.

So how this specially crafted USB stick is actually crafted?

Here are the strict requirements:

  1. The stick doesn’t need to be bootable but it doesn’t hurt either.
  2. It needs to be formated as FAT (VFAT32 worked for me)
  3. Go easy on the size of the USB stick. For me both 4GB and 8GB USB sticks worked
  4. It must have a specific volume label named HP_TOOLS. dosfslabel is your friend.
  5. It also needs a specific directory structure. I will give the layout now and then I will tell you how I end up there. So without further ado:
./Hewlett-Packard
./Hewlett-Packard/BIOSUpdate
./Hewlett-Packard/BIOSUpdate/HpBiosUpdate.log
./Hewlett-Packard/BIOSUpdate/HpBiosUpdate.s09
./Hewlett-Packard/BIOSUpdate/HpBiosMgmt.s14
./Hewlett-Packard/BIOSUpdate/HpBiosUpdate.efi
./Hewlett-Packard/BIOSUpdate/HpBiosUpdate.sig
./Hewlett-Packard/BIOSUpdate/HpBiosMgmt.s12
./Hewlett-Packard/BIOSUpdate/HpBiosUpdate.s14
./Hewlett-Packard/BIOSUpdate/HpBiosMgmt.s09
./Hewlett-Packard/BIOSUpdate/CryptRSA.efi
./Hewlett-Packard/BIOSUpdate/HpBiosMgmt.efi
./Hewlett-Packard/BIOSUpdate/HpBiosUpdate.s12
./Hewlett-Packard/BIOS
./Hewlett-Packard/BIOS/Current
./Hewlett-Packard/BIOS/Current/081EF.bin
./Hewlett-Packard/BIOS/Current/081EF.s12

In HP support forums you can find instructions like these with minor or maybe no differences. People are exchanging screenshots and hope for the best. I followed every piece of advice there and it didn’t work.

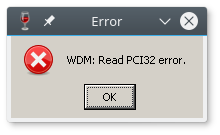
Finally I used WINE https://www.winehq.org/ which is a seriously cool project that time and time again had helped me escape very uncomfortable moments. I used it to run the BIOS update soft-pack file sp81514.exe. It run it, uncompress it and then it gave me this (WDM: Read PCI32 error.):

Screenshot_20170818_013135

and on enter (Error M-FD: PCI read error in DLL)

Screenshot_20170818_013408

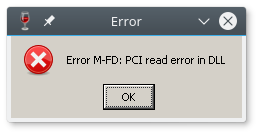
Bummer. But here is the trick: if you keep pressing enter multiple times you finally get

Screenshot_20170818_012736

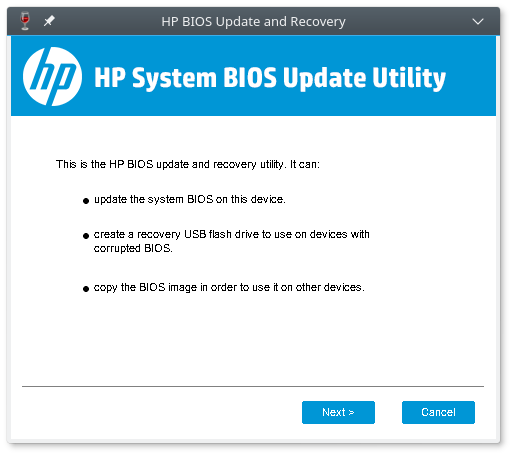
Option 1 is not possible of course in my Linux PC. Option 2 is the most prominent but doesn’t work because it needs low level access to the USB stick and WINE crashes on it. However, the remaining Option 3 generates the proper firmware file and the accompanying signature file. So now we have the firmware. We are still missing the necessary directory tree.

After many hours of trial and error I finally stumbled upon https://h30434.www3.hp.com/t5/Notebook-Operating-System-and-Recovery/How-to-make-bootable-bios-flash-USB-CD-with-WINFLASH-bios/td-p/5219366 which suggests to “Download the latest HP PC Hardware Diagnostics 3-in-1 USB Key available in links below:” https://h30434.www3.hp.com/t5/Notebook-Operating-System-and-Recovery/How-to-make-bootable-bios-flash-USB-CD-with-WINFLASH-bios/td-p/5219366

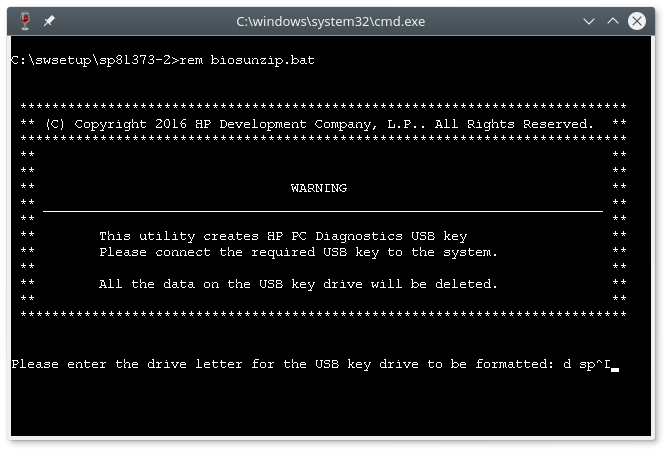
I downloaded the “3-1 sp[number].exe and run it through WINE. Unzipping through 7z doesn’t preserve the directory structure so don’t attempt it. WINE run the executable, installed everything in c:\SWSetup\sp[number] and then it tried to run a DOS bat file.

Screenshot_20170818_021910

Here is the directory listing

bill@localhost:~/.wine/drive_c/SWSetup$ ls sp81373
biosunzip.bat field HPUF.exe makekey.bat README.txt

and what biosunzip.bat tries to do?

It tries to run makekey.bat

and what makekey.bat tries to do?

It tries to run

hpuf.exe %drvletter% -Y -VI -v:HP_TOOLS

Luckily there is a readme that says:

Execute makekey.bat to create HP PC Diagnostics USB key.
----
Instructions from Vision Diags version of makekey.bat:
Makekey.bat usage (Preferred Method)
Note: Administrator privileges are required to use this application. If asked to grant administrator access to the application, please click
Copy all files from the release path to your local hard drive;
Execute makekey.bat from your hard drive.

HPUF.exe usage (Advanced users):
Usage: hpuf.exe targetdevice [A:size] [-MSB] [-FDB]/[-B] [-VI] [-VB] [-V:label][-Y] [-(?|H)]

where
targetdevice Specifies the drive letter of a USB Key to format.
-A:size Overrides the default allocation unit size.
 Valid values are 512, 1024, 2048, 4096, 8192, 16384 (or 16K),
 and 32768 (or 32k)
-B Creates a FreeDOS bootable USB key with all necessary FreeDOS files.
-FDB Creates a FreeDOS bootable USB key with all necessary FreeDOS files.
-MSB Creates an MSDOS formatted USB key. Note: MSDOS files will need to be manually copied onto USB key.
-VI Copies the "field" folder onto the USB key. If -VI is specified, -B will be applied.
-VB Enables verbose output.
-V Specify name for USB key to appear as (maximum 11 characters.)
-Y Suppresses prompting for confirmation. Due to the destructive
 nature of the utility, this option should only be used by
 experienced users.
-(?|H) Displays this usage screen.

Notes
----
The parameters enclosed in square brackets ([]) are optional.

So it tries to copy the field directory in to the USB stick. I helped it by copying manually and lo and behold! It worked! The USB stick booted in HP diagnostics environment. Cool. I tried the combination Win+b and it worked. It booted in the HP BIOS Update facility.

From there is was downhill. I found the necessary directory structure inside the Field directory. After some tests I ended up to the minimum required files that I posted above. With the firmware from the previous step I was able to update my laptop. Easy – peasy!

That’s all folks!

-Wait! What happened with the disk firmware update?

-Oh! I run it through WINE and and said it was a Hitachi disk firmware update. However my disk is a Toshiba one. So I skipped this one. Bye!

TV LG 37LV5500 reflow

I bought this smart TV (LG 37LV5500) set at 2011. At 2015 the problems started. The problem of the TV was that the main processor overheated and lost the connection.

The problem is easily solved by reflowing but only temporarily. After several failed attempts I finally mastered reflowing.

  • I tried the oven method and the TV worked for a month. I even tried to mimic the thermal profile.
  • I tried the heat gun approach and the TV worked for about 1 week.
  • I tried to reball (needs special hardware) and the owner of the reballing hardware talked me out of it. He suggested to buy a new one from e-bay.
  • I bought a replacement board in e-bay but it didn’t work.
  • I finally bought another LG TV with great reservations.

I also found 12v somewhere in the board and added a small fan in order to avoid extensive overheating. The fan must be very thin in order to fit when you try to close the TV. I found that a 40x40x10 was allowing the case to close properly, with a bit of extra pressure. Probably a 50x50x10 or maybe a 60x60x10 fan could also fit in but I wasn’t able to find these fans so there is room for some experimentation.

Enjoy the pictures. The first one shows how to protect the rest of the board (plastic parts etc) by wrapping the board in tinfoil and baker (anti stack) paper. Also I changed thermal paste and replaced the 4 springs with screws in order to make sure the cooler (black metal plate) is hold really tight to the processor.

Definitely a fail but at least I didn’t give up without a decent fight. At the end the local repair shop offered to buy the TV for 40eur.

Continue reading “TV LG 37LV5500 reflow”

GWT SDM (Super Dev Mode) https setup in 7 steps

Introduction

This guide enables you to setup https support for GWT SDM which currently lacks. The guide was created after reading the comments in issue #7535 in github. GWT team may or may not deprecate bookmarklets which SDM currently depends on in order to trigger compilation.

The Guide

The steps required to realize such a setup are:

  1. Install and configure apache: https://wiki.debian.org/Self-Signed_Certificate
    I used the snake oil certificate that comes with Debian and accepted the security exception for the browser to trust the server.
  2. Enable proxy modules for apache
a2enmod proxy
a2enmod proxy_http
a2enmod headers
  1. Use this or something like this for /etc/apache2/sites-enabled/default-ssl.conf
<br />ServerAdmin webmaster@localhost
DocumentRoot /var/www/html

ErrorLog ${APACHE_LOG_DIR}/error.log
CustomLog ${APACHE_LOG_DIR}/access.log combined

SSLEngine on
SSLCertificateFile /etc/ssl/certs/ssl-cert-snakeoil.pem
SSLCertificateKeyFile /etc/ssl/private/ssl-cert-snakeoil.key
<FilesMatch "\.(cgi|shtml|phtml|php)$">
SSLOptions +StdEnvVars

SSLOptions +StdEnvVars

ProxyRequests Off
SSLProxyEngine On
Order deny,allow
Allow from all
ProxyPass / http://localhost:9876/
ProxyPassReverse / http://localhost:9876/

ProxyPassReverse /
Order deny,allow
Allow from all

Header edit Location ^http://localhost:9876/ https://localhost:9877/

  1. Override the CrossSiteIframeLinker
package com.google.gwt.core.linker;

import com.google.gwt.core.ext.LinkerContext;

public class HttpsCrossSiteIFrameLinker extends CrossSiteIframeLinker {
@Override
protected String getJsDevModeRedirectHookPermitted(LinkerContext context) {
return "$wnd.location.protocol == \"http:\" || $wnd.location.protocol == \"file:\" "
+ "|| $wnd.location.protocol == \"https:\"";
}
}
  1. Add this to you *.gwt.xml
<set-configuration-property name="devModeUrlWhitelistRegexp" value="http(s)?://(localhost|127\.0\.0\.1)(:\d+)?/.*" />
<define-linker name="xsiframe" class="com.google.gwt.core.linker.HttpsCrossSiteIFrameLinker" />
  1. Edit and change the compile bookmarklet from http://localhost:9876 to https://localhost:9877 or edit the bookmarklet accordingly to auto sense the protocol. The provided bookmarklet also compiles the first GWT module it founds. This works great as long you have several projects with one GWT module in each one. If you have multiple GWT modules per project you will need to resort to the official bookmarklet which hardwires the module name.
javascript:{
var moduleIndex=0;
var index = 0;
var module_name;
for (var key in __gwt_activeModules) {
if (__gwt_activeModules.hasOwnProperty(key))
if (index === moduleIndex) {
module_name = key;
break;
}
index++;
}
var https = window.location.protocol === 'https:';
var server_url = (https) ? 'https://localhost:9877/' : 'http://localhost:9876/';
window.__gwt_bookmarklet_params = {server_url:server_url, module_name:module_name};
var s = document.createElement('script');
s.src = server_url + 'dev_mode_on.js';
void(document.getElementsByTagName('head')[0].appendChild(s));
}

In order to encode it you can use an on-line service such as

  1. Redeploy – and start compiling GWT scripts deployed in https server pages.

Final Thoughts

GWT team could streamline SDM https support by teaching bookmarklets to set everything up such as:

  • Allow https by default (step: 4 & 5)
  • Autosense the protocol (http or https) and redirect to the SDM compiler accordingly requiring no manual edit of the bookmarklet (step: 6)

As a final note I would like to add that with bookmarklets it is possible to

  • deploy and debug (one click cycle) in the production site. This is invaluable when the GWT module is a CORS enabled web app acting as widget.
  • with the help of ssh tunnels and RDP allow to compile/debug in various systems and mobile browsers such as:
    • Mac OS X
    • iphone linked with Mac OS X
    • Windows all borwsers,
    • Android browser linked to Windows Chrome

However bookmarklets may be deprecated. Their successor may be the -launcherDir option and Thomas Broyer’s dev-server. It is not entirely clear which option or combination will prevail.

TrendChip firmware (ZTE-H108NS): Derived works

Apparently some people found these series of articles useful and decided to built upon. In this post I will list and update all these efforts that come to my attention.

At first was user stav that commented in this blog https://vasvir.wordpress.com/2015/04/16/trendchip-firmware-zte-h108ns-build-custom-software-add-namecheap-ddns-support/#comments

Recently another blog was created that employs tcrevenge to build custom firmware. Check it out here: http://wiki.ozo.com/doku.php?id=welcome#zte_zxhn_h108ns_unlocking_howto

User mobrembski created tpreptprepackack which is based on tcrevenge in order to modify XZ000-G3 firmware.

APC Back-UPS RS 800 overload problem with no load: Solved

That is a quick and easy fix of a very common problem of APC Back-UPS series.

The problem is that the UPS overload red light is constantly turned on even with no load at all. A google search did not reveal any solution other than the board is faulty and there is nothing you can do about it.

I was handed this UPS and naturally I employed all my google foo in order to save a seemingly fine UPS. This time however the solution didn’t come from google but from youtube. If you are like me then you are totally against the wave of video tutorials that are flooding our everyday life. I prefer a text with properly defined steps than a 15′ video documenting a series of three clicks in order to access the desired submenu.

However in electronics repair hackery it actually makes some sense to present your work in a youtube video. I doubt if it is faster this way but lots of people are actually posting very useful stuff there especially for obscure repairs such as this one.

I am writing the post because the solution is not in a youtube video but in a comment. If it was in the video or in the title then the solution will be findable by google. Instead the solution was in the comment section (yes I read youtube comments – can you imagine that?) in Spanish by Lujan Luis Giaccardi with the picture that shows the faulty capacitors red circled. Totally not findable. So I am posting it here for future reference.apc_rs_800

The comment translated in google translate says:

If you turn on the red light of “overload” you have to change the two electrolytes marked in the photo this:

The youtube video where you can find the original comment is https://www.youtube.com/watch?v=66oKHjCo5AA

Since I am not much of an expert in soldering and removing surface mount (SM) electrolytic capacitors I found (easily this time) another youtube video to figure how to get rid of them. Here it is:

I changed the faulty capacitors with normal capacitors and lo and behold! It worked!

Hope that helps.

2018-10-20 Update: The UPS broke again with the same or similar (can’t remember exactly) behavior. The fix this time was to follow the advice in @gentissi comment and replace a third capacitor. Now the UPS works again. Thanks @gentissi for the tip.

Note: The replacement capacitor specifications are 25V, 22mF for the first two and 16V, 22mF for the third. Per @gentissi advice I used 3 capacitors 50V, 22mF.

2019-08-18 Update: The UPS is broken again. This time the problem was that my custom mage power plug had disconnected ground. Totally my bad. Anyway I fixed the ground but the UPS continues to behave erratically. It doesn’t charge and cannot handle any kind of load in battery.

By doing some more research on the Internet I found this: https://www.mikrocontroller.net/topic/462158. It is not in English but it translates quite nice. The gist of it is:

I don’t have the will power currently to try the fix but I thought that others may find this bit useful.

2021-02-13 Update: The UPS works again after I changed C40.

ZTE-ZXHN-H208N: Empire strikes back

Hi everybody! It’s been a while.

Unfortunately this time around I have no clever hack nor good news.

About a year a go I decided to change my ISP following one with a much better offer. After signing the request for transfer I was presented the option to select modem for my new connection.

If you are change averse like me you can probably predict the dialog:

-ISP: So when do you want us to deliver the new modem?

-Me: Oh thank you very much but there is no need for that I have my hardware already setup properly

-ISP: Well you can do as you as wish but you have to know that your home phone will not work because we are switching you to VOIP and your modem does not have VOIP support.

-Me: So can I purchase a modem/router of my selection?

-ISP: Of course you can but standard of the shelf modem wil not be compatible with our VOIP service. Only __our__ equipment is compatible with __our__ VOIP service.

-Me: So it’s a trap!

-ISP: Pretty much yeah.. but at least you don’t have to pay for the trap^H^H^H^H modem.

Actually the last two lines never happened but you get the feeling.

So what was the actual modem delivered to me? You guessed it – or at least you pay attention to the titles of the articles you read. It was a ZTE-ZXHN-H208N an update of the venerable ZTE-H108NS. I thought that it was great – I could hack my way through a temporary obstacle. Just a setback that it would lead to an more enjoyable blog series. Unfortunately it didn’t pan out.

The modem as it was delivered from the new ISP was already pre-configured and locked down.

  • No admin account
  • No capability to save/restore firmware
  • No capability to save/restore settings
  • TR069 already enabled – the modem was controlled by my ISP for all intents and purposes.

Furthermore the official link I posted above advertises DLNA capabilities but the damn thing didn’t even have a USB port. From where it would serve multimedia content beats me.

screenshot_20170102_154928 zte_zxhn_h208n_01

That was the final straw for me. I went and bought a linksys1200ac router and installed openwrt on it. Never looked back and never felt any regret for this decision but this is a topic for another post.

After buying the linksys router a new saga started. Due to modem firmware bugs and incompetence of the (always polite) ISP personnel it was impossible to set the modem in bridge mode or survive a reboot with it enabled. The modem was (still is) in full lock down and it was impossible for me to set the bridge mode. After several attempts, firmware upgrades and unit exchanges finally the modem actually started behave as a bridge. Here are some screenshots so people can be prepared for similar issues from that ISP or this modem.

h208n-bridge-problem-firmware h208n-bridge-problem-error

TrendChip firmware (ZTE-H108NS): Update to handle newer firmware

This is the fourth article in a series of articles documenting the reverse engineering of the TrendChip firmware image and the disassembly of its CRC checksum algorithm.

A small update for the newer firmware (1.17 as distributed by OTE).

tcrevenge was not working with the latest firmware because the version number of the firmware (called surprisingly model number in tcrevenge) was hard coded. Initial tests have been done with firmware 1.07 (model number: 3 6035 122 74) while the 1.17 firmware has model number: 3 6035 122 89.

Newest firmware do not allow older firmware to be uploaded so this was a major problem. Thanks to the efforts of user stav it was possible to identify the problem and add a command line option in tcrevenge to manually set the model number. Now when running tcrevenge in check mode it reads:

Manual check (all tests have been done with model 3) Model: 3 6035 122 74 found 3 6035 122 79. If they differ use -m to adjust.

While I was at it I also added a command line argument for the field called firmware_version. Despite the classy name, looks like it is used only for printing and the firmware does not actually run any checks against it.

With these changes in place there are two variables left in the header section that we don’t know how they are used.

  • magic_number with value 0x32524448
  • magic_device with value 0x100 // this is probably the header size

if the need arises I will add a way to set them from the command line too – but it looks that some disassembly is required first.

The modifications are committed and pushed in the repository so you are ready to roll.

Looks like that version 1.17 as distributed by OTE has disabled the telnet functionality. Again read the comments of user stav how to solve this and how to get rid of the TR69 and CWMP functionality.