TrendChip firmware (ZTE-H108NS): Derived works

Apparently some people found these series of articles useful and decided to built upon. In this post I will list and update all these efforts that come to my attention.

At first was user stav that commented in this blog https://vasvir.wordpress.com/2015/04/16/trendchip-firmware-zte-h108ns-build-custom-software-add-namecheap-ddns-support/#comments

Recently another blog was created that employs tcrevenge to build custom firmware. Check it out here: http://wiki.ozo.com/doku.php?id=welcome#zte_zxhn_h108ns_unlocking_howto

User mobrembski created tpreptprepackack which is based on tcrevenge in order to modify XZ000-G3 firmware.

ZTE-ZXHN-H208N: Empire strikes back

Hi everybody! It’s been a while.

Unfortunately this time around I have no clever hack nor good news.

About a year a go I decided to change my ISP following one with a much better offer. After signing the request for transfer I was presented the option to select modem for my new connection.

If you are change averse like me you can probably predict the dialog:

-ISP: So when do you want us to deliver the new modem?

-Me: Oh thank you very much but there is no need for that I have my hardware already setup properly

-ISP: Well you can do as you as wish but you have to know that your home phone will not work because we are switching you to VOIP and your modem does not have VOIP support.

-Me: So can I purchase a modem/router of my selection?

-ISP: Of course you can but standard of the shelf modem wil not be compatible with our VOIP service. Only __our__ equipment is compatible with __our__ VOIP service.

-Me: So it’s a trap!

-ISP: Pretty much yeah.. but at least you don’t have to pay for the trap^H^H^H^H modem.

Actually the last two lines never happened but you get the feeling.

So what was the actual modem delivered to me? You guessed it – or at least you pay attention to the titles of the articles you read. It was a ZTE-ZXHN-H208N an update of the venerable ZTE-H108NS. I thought that it was great – I could hack my way through a temporary obstacle. Just a setback that it would lead to an more enjoyable blog series. Unfortunately it didn’t pan out.

The modem as it was delivered from the new ISP was already pre-configured and locked down.

  • No admin account
  • No capability to save/restore firmware
  • No capability to save/restore settings
  • TR069 already enabled – the modem was controlled by my ISP for all intents and purposes.

Furthermore the official link I posted above advertises DLNA capabilities but the damn thing didn’t even have a USB port. From where it would serve multimedia content beats me.

screenshot_20170102_154928 zte_zxhn_h208n_01

That was the final straw for me. I went and bought a linksys1200ac router and installed openwrt on it. Never looked back and never felt any regret for this decision but this is a topic for another post.

After buying the linksys router a new saga started. Due to modem firmware bugs and incompetence of the (always polite) ISP personnel it was impossible to set the modem in bridge mode or survive a reboot with it enabled. The modem was (still is) in full lock down and it was impossible for me to set the bridge mode. After several attempts, firmware upgrades and unit exchanges finally the modem actually started behave as a bridge. Here are some screenshots so people can be prepared for similar issues from that ISP or this modem.

h208n-bridge-problem-firmware h208n-bridge-problem-error

TrendChip firmware (ZTE-H108NS): Update to handle newer firmware

This is the fourth article in a series of articles documenting the reverse engineering of the TrendChip firmware image and the disassembly of its CRC checksum algorithm.

A small update for the newer firmware (1.17 as distributed by OTE).

tcrevenge was not working with the latest firmware because the version number of the firmware (called surprisingly model number in tcrevenge) was hard coded. Initial tests have been done with firmware 1.07 (model number: 3 6035 122 74) while the 1.17 firmware has model number: 3 6035 122 89.

Newest firmware do not allow older firmware to be uploaded so this was a major problem. Thanks to the efforts of user stav it was possible to identify the problem and add a command line option in tcrevenge to manually set the model number. Now when running tcrevenge in check mode it reads:

Manual check (all tests have been done with model 3) Model: 3 6035 122 74 found 3 6035 122 79. If they differ use -m to adjust.

While I was at it I also added a command line argument for the field called firmware_version. Despite the classy name, looks like it is used only for printing and the firmware does not actually run any checks against it.

With these changes in place there are two variables left in the header section that we don’t know how they are used.

  • magic_number with value 0x32524448
  • magic_device with value 0x100 // this is probably the header size

if the need arises I will add a way to set them from the command line too – but it looks that some disassembly is required first.

The modifications are committed and pushed in the repository so you are ready to roll.

Looks like that version 1.17 as distributed by OTE has disabled the telnet functionality. Again read the comments of user stav how to solve this and how to get rid of the TR69 and CWMP functionality.

TrendChip firmware (ZTE-H108NS): Build custom software – add namecheap DDNS support

This is the third article in a series of articles documenting the reverse engineering of the TrendChip firmware image and the disassembly of its CRC checksum algorithm.

In this installment we will see how it is possible to create custom software that will run on your modem router. The task at hand is to modify the ez-ipupdate software so it can handle namecheap’s DDNS protocol. Let’s see first how we can build custom software (hello_world.c – How original!), and then we will take a look at the namecheap’s DDNS protocol and finally we will modify the ez-ipupdate. Sounds like a plan, isn’t it?

What could possibly go wrong?
Petrified - Tinos. Photo by Christos AndronisPhoto by Christos Andronis.

Building software for TrendChip firmware

Generally there are two ways to build software for a foreign architecture.

  1. Cross compile (in the host machine)
  2. Build in place (in the target machine)

Cross compiling means that after setting the cross compiler we will need to cross compile the target system’s libc. In this case the target’s libc is uClibc version 0.9.30. Debian’s support for cross architectures reaches its limit in this one. There is a package named gcc-mips-linux-gnu that provides MIPS compiler with GNU libc (glibc). So I assume there is room for fame and glory for somebody to provide gcc-mips-linux-uclibc packages for Debian. I am father of two,the time is limited, the clock is ticking and surprisingly I don’t feel the urge to do the famous 3 stage bootstrap of gcc. Maybe it’s just me getting older.

What about the other option – building in place?

The problem in the second option is that the modem is not equipped neither with a compiler nor the development headers of a libc. The space required for this machinery is very big compared with the 23M that the uncompressed squashfs has.

So what’s left? Google I suppose and lo and behold – I found it. The uClibc project builds system images for all uClibc versions. You can boot the system image with qemu like this

system-image-mips$ ./run-emulator.sh 
Linux version 2.6.25.10 (landley@driftwood) (libc/sysdeps/linux/mips/crt1.S:(.text+0x1c): undefined reference to `main') #1 SMP Sun Nov 23 06:55:47 CST 2008

LINUX started...
Overriding previous set SMP ops
console [early0] enabled
CPU revision is: 00019300 (MIPS 24K)
FPU revision is: 00739300
registering PCI controller with io_map_base unset
Determined physical RAM map:
 memory: 00001000 @ 00000000 (reserved)
 memory: 000ef000 @ 00001000 (ROM data)
 memory: 0025a000 @ 000f0000 (reserved)
 memory: 07cb5000 @ 0034a000 (usable)
Wasting 26944 bytes for tracking 842 unused pages
Zone PFN ranges:
  DMA             0 ->     4096
  Normal       4096 ->    32767
Movable zone start PFN for each node
early_node_map[1] active PFN ranges
    0:        0 ->    32767
Built 1 zonelists in Zone order, mobility grouping on.  Total pages: 32512
Kernel command line: root=/dev/hda console=ttyS0 rw init=/usr/bin/qemu-setup.sh panic=1 PATH=/usr/bin 
Primary instruction cache 2kB, VIPT, 2-way, linesize 16 bytes.
Primary data cache 2kB, 2-way, VIPT, no aliases, linesize 16 bytes
Synthesized clear page handler (26 instructions).
Synthesized copy page handler (46 instructions).
Cache parity protection disabled
PID hash table entries: 512 (order: 9, 2048 bytes)
CPU frequency 200.00 MHz
Dentry cache hash table entries: 16384 (order: 4, 65536 bytes)
Inode-cache hash table entries: 8192 (order: 3, 32768 bytes)
Memory: 126396k/127700k available (1843k kernel code, 1140k reserved, 263k data, 136k init, 0k highmem)
Mount-cache hash table entries: 512
Trying to install interrupt handler for IRQ16
Trying to install interrupt handler for IRQ17
Brought up 1 CPUs
net_namespace: 160 bytes
NET: Registered protocol family 16
pci 0000:00:0a.3: quirk: region 1100-110f claimed by PIIX4 SMB
NET: Registered protocol family 2
IP route cache hash table entries: 1024 (order: 0, 4096 bytes)
TCP established hash table entries: 4096 (order: 3, 32768 bytes)
TCP bind hash table entries: 4096 (order: 3, 32768 bytes)
TCP: Hash tables configured (established 4096 bind 4096)
TCP reno registered
io scheduler noop registered (default)
rtc: SRM (post-2000) epoch (2000) detected
Real Time Clock Driver v1.12ac
Serial: 8250/16550 driver $Revision: 1.90 $ 4 ports, IRQ sharing disabled
serial8250.2: ttyS0 at I/O 0x3f8 (irq = 4) is a 16550A
console handover: boot [early0] -> real [ttyS0]
serial8250.2: ttyS1 at I/O 0x2f8 (irq = 3) is a 16550A
loop: module loaded
pcnet32.c:v1.34 14.Aug.2007 tsbogend@alpha.franken.de
PCI: Enabling device 0000:00:0b.0 (0000 -> 0003)
pcnet32: PCnet/PCI II 79C970A at 0x1020, 52:54:00:12:34:56 assigned IRQ 10.
eth0: registered as PCnet/PCI II 79C970A
pcnet32: 1 cards_found.
Uniform Multi-Platform E-IDE driver
ide: Assuming 33MHz system bus speed for PIO modes; override with idebus=xx
hda: QEMU HARDDISK, ATA DISK drive
hdc: QEMU DVD-ROM, ATAPI CD/DVD-ROM drive
ide0 at 0x1f0-0x1f7,0x3f6 on irq 14
ide1 at 0x170-0x177,0x376 on irq 15
hda: max request size: 512KiB
hda: 4194304 sectors (2147 MB) w/256KiB Cache, CHS=4161/255/63
hda: cache flushes supported
 hda: unknown partition table
TCP cubic registered
NET: Registered protocol family 1
NET: Registered protocol family 17
EXT2-fs warning: mounting unchecked fs, running e2fsck is recommended
VFS: Mounted root (ext2 filesystem).
Freeing prom memory: 956k freed
Freeing unused kernel memory: 136k freed
eth0: link up
Type exit when done.
/ #


The system image provides gcc-4.1.2 while the binaries in the modem are built with gcc-3.4.6 (at least the kernel). Let’s hope that the backward compatibility would be good enough in order to build things in the system-image and then copy them in the squashfs filesystem of the modem.

FileSystem woes

Before we continue we need to adjust the environment to our development cycle. The uclibc provided system image is 64MB (around 50MB root filesystem). It has vi and gcc and make but nothing more. It would be nice if we could mount some host’s exported directories in order to:

  • have available more space for the software builds
  • use host based editors and file managers

The combination of qemu and linux provides 3 ways to mount host’s provided directories. For more information and the gory details check this article by Rob Landley and Mark Miller especially this part.

  1. NFS
  2. SAMBA (private samba server runs by qemu with -smb option)
  3. FAT image

Any of them should work in theory but you should know the drill by now. It took me two weeks to accept the bitter truth of failure. The reason of the failure was that the uclibc provided kernel has no support for modules and no support for NFS, SMB and FAT filesystems. It took me a week and several network dumps from wireshark to figure out that the dreaded 111 mount returned error means the kernel has no support for NFS. It took me one more week to accept the fact that I can’t build a kernel for MIPS because:

  • buildroot of the time fails when it’s trying to build the kernel in a modern system
  • cross compiling a MIPS kernel on a recent Debian gives many errors on older kernels and a fatal one in the latest. In any case I cannot find the zImage target in the generated Makefiles.

So what is left? I resized the rootfs image to 2GB and mount it with the loop device. Of course concurrent access via the host and the emulated guest is not allowed so you have to be careful and run qemu / mount / unmount / run qemu again all the time.

Here is how to resize a filesystem image:

#dd if=/dev/zero of=disk.img bs=1M count=1024 oflag=append conv=notrunc
#e2fsck -f disk.img
#resize2fs disk.img

and here is how to mount / unmount between qemu invocations

#mount -o loop ./uclibc/0.9.30/system-image-mips/image-mips.ext2 /mnt/
#umount ./uclibc/0.9.30/system-image-mips/image-mips.ext2

ez-ipupdate invocation

The first step is to establish the beachhead. We make sure that hello world works. Indeed although the compiler is different – compiling in the guest system is good enough for the hello world to run in the modem just by copying the executable around (and rebuilding the firmware with tcrevenge).

The ez-ipupdate is free software hosted on sourceforge. It is written in C so in theory a modification like this is relatively easy. The namecheap’s DDNS protocol is not exactly rocket science to get right. So let’s see what the TrendChip firmware is doing and how it invokes the ez-ipupdate.

There is the file /etc/ddns.conf which looks like a direct dump of what is stored in the XML romfile. Probably cfg_manager dumps it in that form so subsequent scripts can operate on this data more easily.

# cat /etc/ddns.conf 
Active="Yes"
SERVERNAME="www.dyndns.org"
MYHOST="myhost.mydomain.noip"
USERNAME="username"   # It is literally username as it not prefixed with my (as in myusername)
PASSWORD="mypassword"
WILDCARD="No"

Then there is /etc/ipupdate.conf

# cat /etc/ipupdate.conf 
user=username:mypassword
host=myhost.mydomain.noip
service-type=dyndns
max-interval=2073600

which is what will be feed to the ez-ipupdate executable.

There are two scripts. The usr/script/ddns.sh converts the /etc/ddns.conf to the /etc/ipupdate.conf. The other one (/usr/scripts/ddns_run.sh) runs the ez-ipupdate with the /etc/ipupdate.conf as configuration parameter.

Namecheap’s DDNS protocol

It’s not really a protocol. It’s a http GET with certain parameters to the namecheap’s server. Here is how you can update your PC’s DNS manually with curl.

$curl https://dynamicdns.park-your-domain.com/update?host=myhost&domain=mydomain.com&password=mypassword&ip=myip

The only tricky part left is to parse the variables in the configuration file and assemble the GET request.

Finally: Compiling custom software – ez-ipupdate

The following patch implements namecheap support at expense of dyndns support. The potential users of this hack must use the configuration entries of the WEB GUI to fill the proper information in the dyndns section. The TrendChip firmware will use the hostname and password but it will connect to the namecheap’s servers instead.

diff -ur ez-ipupdate-3.0.11b7.orig/ez-ipupdate.c ez-ipupdate-3.0.11b7/ez-ipupdate.c
--- ez-ipupdate-3.0.11b7.orig/ez-ipupdate.c     2002-03-12 01:31:47.000000000 +0200
+++ ez-ipupdate-3.0.11b7/ez-ipupdate.c  2015-03-01 20:35:57.981976162 +0200
@@ -56,9 +56,9 @@
 #define DHS_REQUEST "/nic/hosts"
 #define DHS_SUCKY_TIMEOUT 60
 
-#define DYNDNS_DEFAULT_SERVER "members.dyndns.org"
+#define DYNDNS_DEFAULT_SERVER "dynamicdns.park-your-domain.com"
 #define DYNDNS_DEFAULT_PORT "80"
-#define DYNDNS_REQUEST "/nic/update"
+#define DYNDNS_REQUEST "/update"
 #define DYNDNS_STAT_REQUEST "/nic/update"
 #define DYNDNS_MAX_INTERVAL (25*24*3600)
 
@@ -1919,11 +1919,20 @@
     output(buf);
   }
 
-  snprintf(buf, BUFFER_SIZE, "%s=%s&", "hostname", host);
+  char *dot = strchr(host, '.');
+  *dot = 0;
+  char *domain = dot + 1;
+  
+  snprintf(buf, BUFFER_SIZE, "%s=%s&", "host", host);
+  output(buf);
+  snprintf(buf, BUFFER_SIZE, "%s=%s&", "domain", domain);
+  output(buf);
+  snprintf(buf, BUFFER_SIZE, "%s=%s&", "password", password);
   output(buf);
+    
   if(address != NULL)

One more note: The size of the final ez-update was 122624 bytes while the original was only 84720 bytes. Could it be the compiler? I tried with -Os and stripped all symbols. My guess for this sudden file increase is that ez-ipupdate has support for many DDNS protocols that are not listed in the web GUI of the Trendchip firmware. It is possible therefore that they had stripped the support of the missing protocols from the ez-ipupdate in order to save space.

After patching and moving the ez-ipupdate sources to the guest system the usual procedure of

$./configure
$make

can be used to build the software for MIPS. Copy the resulting executable to the expanded squashfs, create squashfs image, rebuild the firmware and upload it to the modem and you are ready.

Hope it was fun. Now off you go to build minidlna in order to enable streaming from your modem router.

TrendChip Firmware XOR checksum algorithm disassembly

I have to warn you: this is not a standalone article. How I ended up writing about MIPS disassembly with zero previous experience is documented in another article that lists the adventures I had with my ZTE H108NS modem router.

Nevertheless, here I am standing against an unknown architecture, trying to reverse engineer the mighty XOR checksum algorithm used by the modem to distinguish correct from incorrect firmware. Note that this wasn’t a linear process with a start, a main part and an end. It was mostly a tree of attempts with extensive backtracking which is just a cool way to say “trial and error”. However, I do care to make sense to my readers so I will try to present the events in a linear manner.

TrendChip firmware employs a first stage bootloader in partition 0 that has the capability to upload new firmware in order to unbrick your modem router. Since this a minimal bootloader it should be easy to navigate around and find the XOR checksum algorithm.

In addition while in normal mode the TrendChip firmware employs the cfg_manager binary to perform the firmware upload. It is a safe bet that cfg_manager has to implement the XOR checksum algorithm also. cfg_manager is a much bigger binary with all kinds of functionality. It should be significantly more difficult to find the algorithm we are searching in its assembly listings.

There is a reason that the saying

Assumption is the mother of all fuckups.

is a fact of life. In this case the assumptions that cost me several days was

  • small binary – easy to understand and manipulate
  • big binary – difficult to navigate and understand

BOOTROM and Primary Bootloader

We will see how common sense rules can fail in a short while. In the meantime how do we disassemble a MIPS binary in a Debian GNU/Linux workstation? I never claimed to be google shy so after some searches and non educated guesses I found:

I had problems with the first three. In retrospect the biggest problem was that I was trying to disassemble the primary bootloader of partition 0 without knowing the base address. One very important free variable to the disassembly problem is the base address. If you don’t get the base address right the disassembly listings don’t make sense when the program tries to perform absolute jumps or to read data. So more google…

Looks like that MIPS boards initialize the BOOTROM base address at 0xbfc00000 most of the times. If you get that correctly the later steps are a breeze. Let’s see how it is done.

The first thing to do is install cross MIPS binutils in our system. Debian has excellent support for cross architectures and libraries. Cross architecture support is admittedly of the most difficult problems to get right so let’s use it:

apt-get install binutils-mips-linux-gnu

And now let’s disassemble

mips-linux-gnu-objcopy -I binary -O elf32-tradbigmips -B mips --rename-section .data=.text --change-address 0xbfc00000 p0.head p0.head.elf
mips-linux-gnu-objdump -D p0.head.elf > p0.head.asm

Here is how it looks like

bfc00000 :
bfc00000:   0bf0000a    j   bfc00028 
bfc00004:   00000000    nop
    ...
bfc00028:   3c02bfbf    lui v0,0xbfbf
bfc0002c:   34420200    ori v0,v0,0x200
bfc00030:   24040000    li  a0,0
bfc00034:   24050000    li  a1,0
bfc00038:   ac440000    sw  a0,0(v0)
bfc0003c:   ac450014    sw  a1,20(v0)
bfc00040:   00000000    nop
bfc00044:   3c03bfb0    lui v1,0xbfb0
bfc00048:   3c048000    lui a0,0x8000
bfc0004c:   3484ffff    ori a0,a0,0xffff
bfc00050:   24050000    li  a1,0
bfc00054:   ac640000    sw  a0,0(v1)
bfc00058:   ac650004    sw  a1,4(v1)
bfc0005c:   8c6400b0    lw  a0,176(v1)
bfc00060:   00000000    nop
bfc00064:   00042302    srl a0,a0,0xc
bfc00068:   308400ff    andi    a0,a0,0xff
bfc0006c:   10800016    beqz    a0,bfc000c8 
bfc00070:   00000000    nop
bfc00074:   3c090463    lui t1,0x463
bfc00078:   35291000    ori t1,t1,0x1000
bfc0007c:   240a018f    li  t2,399
bfc00080:   240b01f3    li  t3,499
bfc00084:   240c01c1    li  t4,449
bfc00088:   012a2025    or  a0,t1,t2
bfc0008c:   018a082a    slt at,t4,t2
bfc00090:   10200002    beqz    at,bfc0009c 
bfc00094:   00000000    nop
bfc00098:   34848000    ori a0,a0,0x8000
bfc0009c:   ac6400b0    sw  a0,176(v1)
bfc000a0:   00000000    nop
bfc000a4:   24081388    li  t0,5000
bfc000a8:   2508ffff    addiu   t0,t0,-1
bfc000ac:   1500fffe    bnez    t0,bfc000a8 
bfc000b0:   00000000    nop
bfc000b4:   114b0004    beq t2,t3,bfc000c8 
bfc000b8:   00000000    nop
bfc000bc:   214a0005    addi    t2,t2,5
bfc000c0:   0bf00022    j   bfc00088 
bfc000c4:   00000000    nop
bfc000c8:   3c048000    lui a0,0x8000
bfc000cc:   34840300    ori a0,a0,0x300
bfc000d0:   3c058000    lui a1,0x8000
bfc000d4:   34a50504    ori a1,a1,0x504
bfc000d8:   3c068000    lui a2,0x8000
bfc000dc:   34c60706    ori a2,a2,0x706


We obviously need some education on the MIPS architecture, instruction set and register layout. One thing I didn’t know and I couldn’t foresee is that due to the pipeline architecture of MIPS the instruction after a jump will be executed. That’s why it is typical to suffix a jump with a nop instruction like at offset 0xbfc000c4 or 0xbfc000b8.

So what the above code is doing exactly? Well it is the BOOTROM, it sets things up and then copies some code at 0xb8000000 and jumps there. Can we disassemble that part?

dd if=p0 of=p0.1 seek=960 bs=1
mips-linux-gnu-objcopy -I binary -O elf32-tradbigmips -B mips --rename-section .data=.text --change-address 0xb80000000 p0.1 p0.1.elf
mips-linux-gnu-objdump -D p0.1.elf > p0.1.asm

and here is where the control is relinquished to

Disassembly of section .text:

80000000 :
    ...
80000280:   3c1a8000    lui k0,0x8000
80000284:   275a0290    addiu   k0,k0,656
80000288:   03400008    jr  k0
8000028c:   00000000    nop
80000290:   3c1c8000    lui gp,0x8000
80000294:   279c1890    addiu   gp,gp,6288
80000298:   27881fe0    addiu   t0,gp,8160
8000029c:   251dfff0    addiu   sp,t0,-16
800002a0:   3c088000    lui t0,0x8000
800002a4:   25081870    addiu   t0,t0,6256
800002a8:   ad000000    sw  zero,0(t0)
800002ac:   3c098000    lui t1,0x8000
800002b0:   2529388c    addiu   t1,t1,14476
800002b4:   3c1a8000    lui k0,0x8000
800002b8:   275a3890    addiu   k0,k0,14480
800002bc:   25080004    addiu   t0,t0,4
800002c0:   ad000000    sw  zero,0(t0)
800002c4:   1509fffd    bne t0,t1,800002bc 
800002c8:   00000000    nop
800002cc:   0c0000b8    jal 800002e0 
800002d0:   00000000    nop

At that point I was lost. I had no idea where the primary bootloader was and what this thing was doing. Back to the drawing board.

QEMU

I have to say at this point that my assembly skills are not that good to figure all these out just from the assembly listings without some help. The help was the qemu emulator program. Although qemu would barf in board specific initialization attempts it was still valuable to figure out how the BOOTROM boots the primary bootloader. Here are some tips:

Connect to gdb

qemu-system-mips  -M mips -pflash flash -monitor null -nographic -S -s
#from another terminal
gdb-multiarch p0.head.elf
gdb>
  target remote localhost:1234
  load p0.head.elf32
  x/14i $pc
  stepi
  info registers

Run and keep instruction set log

qemu-system-mips -L .  -option-rom 0xbfc00000.bin  -pflash flash -monitor null -nographic -d in_asm 2>stderr

where flash is the part of the flash memory you want to run.

In a perfect world it should be possible to run the primary bootloader by running the flash contents. I believe everyone should have collect enough hints by now about which world we are living in so the fact that qemu doesn’t reach that point doesn’t come as a total surprise. Still qemu was very helpful if you treat it as one additional weapon in your arsenal and not as a silver bullet.

cfg_manager

Trying the alternate plan since I got stuck previously. Let’s see what’s going on with the cfg_manager. After playing with too much open variables, disassembler, base address, unknown platform, I  suddenly realized a very simple and very obvious (in retrospect) fact.

The cfg_manager binary was not stripped

At first I realized that with the help of the recstudio running under WINE, through it was obvious also with objdump . I couldn’t figure how to load a binary in the Linux version but I did managed it with the windows executable and WINE. At the right corner was a small almost invisible panel (you had to resize it to view it) with the program’s symbols. I am a visual guy but usually not very good to optical grepping. In this case though even I was not able not to see a function named upgrade_firmware which calls image_check_tc which calls calculate_crc32. Bingo!!!

cfg_manager_recstudio_01
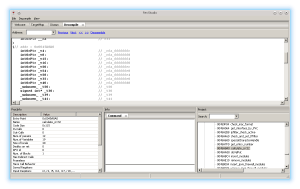
And here is the C code for the CRC calculation as decompiled by recstudio.cfg_manager_recstudio_02
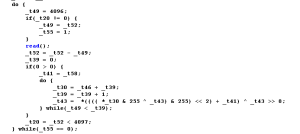
Let’s see the assembly code from objdump in case it may be helpful.

0045a8a0 :
  ...
  45a93c:   02251821    addu    v1,s1,a1
  45a940:   90620000    lbu v0,0(v1)
  45a944:   24a50001    addiu   a1,a1,1
  45a948:   00501026    xor v0,v0,s0
  45a94c:   304200ff    andi    v0,v0,0xff
  45a950:   00021080    sll v0,v0,0x2
  45a954:   00461021    addu    v0,v0,a2
  45a958:   8c440000    lw  a0,0(v0)
  45a95c:   00101a02    srl v1,s0,0x8
  45a960:   00b2102a    slt v0,a1,s2
  45a964:   1440fff5    bnez    v0,45a93c 
  45a968:   00838026    xor s0,a0,v1
  45a96c:   1280ffe5    beqz    s4,45a904

The interesting bit is that the CRC algorithm uses a lookup table. If you can figure that out and where that table is located you are golden. In cfg_manager the lookup table is located at 0x4769b0 and the C code of the CRC calculation (taken from tcrevenge) looks like this:

const char crc32_c[] = "0000000077073096ee0e612c...8ea15a05df1b2d02ef8d";
#define crc32_c_size ((sizeof(crc32_c) - 1) / sizeof(char))
unsigned char crc32_m[crc32_c_size >> 1];
#define crc32_size sizeof(crc32_m) / sizeof(char)

static int be2int(unsigned char *c) {
  return c[3] | (c[2] << 8) | (c[1] << 16) | c[0] << 24);
}

unsigned int calc_crc32(unsigned int sum, const char *filename, int offset) {
  unsigned char buffer[4096];
  int fd = open(filename, O_RDONLY);
  lseek(fd, offset, SEEK_SET); /* skip header */
  int rc;

  while ((rc = read(fd, buffer, sizeof(buffer))) > 0) {
    int i;
    for(i=0; i< rc; i++) {
      sum = be2int(crc32_m + (((buffer[i] ^ sum) & 0xFF) << 2)) ^ sum >> 8;
      //printf("byte %02x, sum %08x\n", buffer[i], sum);
    }
  }
    
  close(fd);
  return sum;
}

...

/* Initialize crc32_m from crc32_c */
  unsigned int j;
  char cnv[] = {0, 0};
  for (i = 0; i < crc32_size; i++) {
    j = i << 1;
    cnv[0] = crc32_c[j];   
    const int high = (int) strtol(cnv, NULL, 16);
    cnv[0] = crc32_c[j + 1];
    const int low = (int) strtol(cnv, NULL, 16);
    const int val = 16 * high + low;
    //printf("%d %d %d %02x\n", low, high, val, val);
    crc32_m[i] = val;
  }

Back to the primary bootloader

So after all it was easier to reverse engineer the cfg_manager (due to non-stripping) than the primary bootloader. However it is not like me to leave unfinished business. The primary bootloader needs to have the lookup table also in partition 0 in order to be able to clone the behavior. If we do a hex search with the first bytes of the lookup table then we can find the offset of the lookup table in the partition 0.

Nope it isn’t there. Now what?

Let’s try binwalk in the partition 0. We have never tried binwalk in that partition before because it isn’t part of the firmware image.

$ binwalk -e p0

DECIMAL       HEXADECIMAL     DESCRIPTION
--------------------------------------------------------------------------------
7216          0x1C30          LZMA compressed data, properties: 0x5D, dictionary size: 8388608 bytes, uncompressed size: 120416 bytes
$ls
p0 _p0.extracted
$ls _p0.extracted/
1C30  1C30.7z
cd _p0.extracted/
$mips-linux-gnu-objcopy -I binary -O elf32-tradbigmips -B mips --rename-section .data=.text --change-address 0x81fb0000 1C30 1C30.elf
$mips-linux-gnu-objdump -D 1C30.elf > 1C30.asm

That was it. The primary bootloader was actually LZMA compressed inside the partition 0. Here is how it looks like:

Disassembly of section .text:

81fb0000 :
    ...
81fb0280:   3c1a81fb    lui k0,0x81fb
81fb0284:   275a0290    addiu   k0,k0,656
81fb0288:   03400008    jr  k0
81fb028c:   00000000    nop
81fb0290:   3c1c81fe    lui gp,0x81fe
81fb0294:   279c6864    addiu   gp,gp,26724
81fb0298:   27881fe0    addiu   t0,gp,8160
81fb029c:   251dfff0    addiu   sp,t0,-16
81fb02a0:   3c0881fd    lui t0,0x81fd
81fb02a4:   2508d660    addiu   t0,t0,-10656
81fb02a8:   ad000000    sw  zero,0(t0)
81fb02ac:   3c0981ff    lui t1,0x81ff
81fb02b0:   25298bac    addiu   t1,t1,-29780
81fb02b4:   3c1a81ff    lui k0,0x81ff
81fb02b8:   275a8bb0    addiu   k0,k0,-29776
81fb02bc:   25080004    addiu   t0,t0,4
81fb02c0:   ad000000    sw  zero,0(t0)
81fb02c4:   1509fffd    bne t0,t1,81fb02bc 
81fb02c8:   00000000    nop

Searching reveals that the lookup table is at 0x81fcaad0. Searching for aad0 in the instruction set reveals the position where the lookup table is accessed and so where the CRC calculation leaves. Here is the relevant part:

81fb49c8:   3c0281fd    lui v0,0x81fd  <--- The lookup table has a different base address than the code
81fb49cc:   2453aad0    addiu   s3,v0,-21808  <--- Access Lookup table
81fb49d0:   8e820000    lw  v0,0(s4)   <--- Start of the main loop
81fb49d4:   00000000    nop
81fb49d8:   30420001    andi    v0,v0,0x1
81fb49dc:   10400006    beqz    v0,81fb49f8 
81fb49e0:   00000000    nop
81fb49e4:   0c7f24f4    jal 81fc93d0 
81fb49e8:   02202021    move    a0,s1
81fb49ec:   00021600    sll v0,v0,0x18
81fb49f0:   087ed280    j   81fb4a00 
81fb49f4:   00021603    sra v0,v0,0x18
81fb49f8:   82220000    lb  v0,0(s1)
81fb49fc:   00000000    nop
81fb4a00:   00521026    xor v0,v0,s2
81fb4a04:   304200ff    andi    v0,v0,0xff
81fb4a08:   00021080    sll v0,v0,0x2
81fb4a0c:   00531021    addu    v0,v0,s3
81fb4a10:   00121a02    srl v1,s2,0x8
81fb4a14:   8c420000    lw  v0,0(v0)
81fb4a18:   00000000    nop
81fb4a1c:   00629026    xor s2,v1,v0
81fb4a20:   2610ffff    addiu   s0,s0,-1
81fb4a24:   1600ffea    bnez    s0,81fb49d0  <--- End of main loop

As you can see the algorithm is equivalent with the one found in the cfg_manager.

Cool project verified and finished. Hope you had fun (for weird values of fun).

Reverse Engineering TrendChip Firmware (ZTE-H108NS).

It all started when I bought a new computer at home for my developer needs. Usually I fall to the other end of the gadget likeness spectrum. Specifically I avoid buying gadget stuff due to the unhealthy amount of time I found myself devoting to their configuration. However this time the conspiracy of things was masterfully executed to the point that I didn’t notice until it was too late (a blog and a github project later).

Actually If I want to be pedantic the first pieces has been fallen into place about 6 months before when my father switched ISP and he ended up with two new modems (ZTE-H108NS). Since I was the one that configured the new connections I preferred to use the existing modems in place. So I ended up with two brand new modems. At the time I thought “Hm? Maybe I should try to optimize my DSL line with a new modem and get rid of my trusty speedtouch 585“. I didn’t realize it then but that was probably the cornerstone that put in motion a series of events.

When finally my new computer arrived it had a feature that my previous 12 year computer was lacking. The mighty new feature was a working sleep/hibernate implementation. I immediately thought “Cool – I will be now able to hibernate my computer – It will not need to stay up all the time.”. Here is the train of thought:

  • But what if I need something when I am away and my computer is turned off?

  • Well we should try this thing called WOL (Wake on LAN) – Another new feature for me.

Two weeks later after I have studied in detail all possible permutations of BIOS options, the fine differences between S4, power off and hybrid mode and wandered in forums I finally managed to master the WOL from my LAN.

  • So what about the WAN? After all if I could use the LAN I could always switch on my computer by pressing the button – no need for WOL at all.

  • Wait! said an inner voice and the only advice I can give to myself from now on to not listen again that particular inner voice. If you are going to teach the modem about WOL maybe you should finally ditch the speedtouch 585. and invest some time to the new ZTE-H108NS modem said the voice.

DSL Line Optimization

So I switched modems – I configured the new modem and went to device status page in order to check on the DSL link speed. It was a gapping 12MBit/s exactly the same with the speedtouch 585. Given that my house is 35 meters away from the OTE (Greek ISP provider) building this is unacceptable. I picked up the phone and called my ISP. 15′ later my modem was syncing in 18MBit/s. Not bad.

Further research suggested the following command line (telnet interface of the modem)

#wan dmt2 set snrmoffset 4096 4096
#wan adsl reset

which happily increased my downlink to 22MBit/s. I thought let’s call it a day on the speed front and let’s concentrate back in the energy footprint front.

WOL over WAN

I was able to send the WOL over the internet with a minor arp tables hack. Specifically I had to map another address, let’s say 192.168.1.254 to the broadcast address.

#arp -s 192.168.1.254 FF:FF:FF:FF:FF:FF

Then on Advanced Setup/NAT/Virtual Server I setup a rule for ports 7-9 that goes to the internal ip address 192.168.1.254 which due to the above arp hack ends up as a broadcast packet waking up my computer. The following command wakes up my computer from anywhere in the world.

$wakeonlan -i `host myhost.mydomain.com | awk '{print $NF;}'` de:ad:ca:fe:be:ef

where myhost.mydomain.com is my Dynamic DNS hostname and de:ad:ca:fe:be:ef is the MAC address of my computer.

Dynamic DNS

The situation now begs the question: If the computer is turned off who is gonna maintain the Dynamic DNS entry up to date? Normally this is a job for the modem router because it has intimate knowledge of the external ip address and its changes. I am already a client of namecheap and I would like to use that provider for DDNS. Of course since the Internet community hasn’t succeed so far to standardize the DDNS updates protocol consequently the ZTE-H108NS modem doesn’t have support for namecheap.

Samba woes

In the meantime my wife had an unusual request. She wanted to print like it was the most natural thing of the world. I responded to the request lightly, full of self confidence. I installed samba and cloned the configuration from the backup of my previous setup. Yep that’s right. I am that good. I have a backup. What could possibly go wrong?

Well for starters my new machine was not visible in the network neighborhood. This took a good 2-3 hours to figure it out and it was a lesson to humility. It turns out that:

  1. The modem DHCP server sets itself as WINS server.
  2. Although nmbd is running the smb.conf in the modem does not enable WINS support. Bummer!
  3. There is no option in the GUI to enable the WINS server
  4. The modem confuses the workgroup name with the NETBIOS and vice versa.

The Decision

At this point insurmountable pressure has been gathered. I needed to hack the modem in order to fix the following itches ^H^H items.

  1. DSL Line setup
  2. Arp table setup for WAN WOL support
  3. Enable the WINS server in smb.conf
  4. namecheap Dynamic DNS support

These problems are not fixable without modifying the root filesystem or uploading custom firmware. Some of them require just a configuration file change but the namecheap Dynamic DNS support requires to modify and rebuild a MIPS executable.

Reverse Engineering -Know your enemy

Let’s try to find some info on this thing. I opened the case and I found these chips:

  • Chassis PCB – BZRD0 V1.0
  • CPU – U100 TrenChip TC3162U-LQ128G
  • SDRAM- EtronTech EM6381165TS-6G
  • SPI Flash – winbond 25Q16BVSIG

Let’s enter the modem via telnet:

$ telnet 192.168.1.1
Trying 192.168.1.1...
Connected to 192.168.1.1.
Escape character is '^]'.
 login: admin
Password:
# cat /proc/cpuinfo 
system type             : TrendChip TC3162U SOC
processor               : 0
cpu model               : R3000 V0.1
BogoMIPS                : 330.95
wait instruction        : no
microsecond timers      : no
tlb_entries             : 32
extra interrupt vector  : no
hardware watchpoint     : no
ASEs implemented        :
shadow register sets    : 1
VCED exceptions         : not available
VCEI exceptions         : not available
unaligned accesses      : 187256836
#
# free
              total         used         free       shared      buffers
  Mem:        29196        27936         1260            0         2088
 Swap:            0            0            0
Total:        29196        27936         1260
# ls -l /
drwxr-xr-x    2 17431    10513         389 bin
drwxr-xr-x    4 17431    10513          46 boaroot
drwxr-xr-x    6 17431    10513         535 dev
lrwxrwxrwx    1 17431    10513           8 etc -> /tmp/etc
drwxr-xr-x    4 17431    10513        1507 lib
lrwxrwxrwx    1 17431    10513          11 linuxrc -> bin/busybox
dr-xr-xr-x   64 0        0               0 proc
drwxr-xr-x    2 17431    10513         138 sbin
drwxr-xr-x    7 0        0               0 tmp
drwxr-xr-x    4 17431    10513         107 userfs
drwxr-xr-x    7 17431    10513          67 usr
lrwxrwxrwx    1 17431    10513           8 var -> /tmp/var
# ls /etc/
AppFilter.sh             ipv6_acl.sh              nat_pvc9_0
RT30xxEEPROM.bin         isp0.conf                nat_pvc9_1
UrlFilter.sh             isp1.conf                nat_pvc9_2
Wireless                 isp11.conf               nat_pvc9_3
acl.sh                   l7-protocols             nat_pvc9_4
add_rule_for_dhcp.sh     lanAlias0.conf           nat_pvc9_5
adsl.conf                lan_rip.conf             nat_pvc9_6
adsl.sh                  lanconfig.sh             nat_pvc9_7
autoexec.sh              mac.conf                 ntp.sh
bftpd.conf               nat_pvc0                 passwd
config                   nat_pvc1                 ppp
ddns.conf                nat_pvc10                protocols
defaultWan.conf          nat_pvc10_0              radvd.conf
devInf.conf              nat_pvc10_1              resolv.conf
device_hostindex.conf    nat_pvc10_2              resolv_ipv4.conf
dhcp6c.conf              nat_pvc10_3              resolv_ipv6.conf
dhcp6s.conf              nat_pvc10_4              ripd.conf
dhcpd                    nat_pvc10_5              route6.sh
dnsmasq.conf             nat_pvc10_6              samba
dproxy.conf              nat_pvc10_7              services
ethertypes               nat_pvc2                 shaper
firewall.conf            nat_pvc3                 snmp
fstab                    nat_pvc4                 snmpd.conf.tmp
fwTCver.conf             nat_pvc5                 sysconfig
fwver.conf               nat_pvc6                 system
group                    nat_pvc7                 trx_config
hosts                    nat_pvc8                 udhcp_lease
igd                      nat_pvc8_0               udhcpd.conf
igmpproxy.conf           nat_pvc8_1               udhcpd.fon.conf
inetd.conf               nat_pvc8_2               udhcpd.fon.leases
init.d                   nat_pvc8_3               usb_modeswitch.conf
inittab                  nat_pvc8_4               usb_modeswitch.d
inittab_no_ra_menu       nat_pvc8_5               usb_modeswitch_cfg.conf
inittab_ra_menu          nat_pvc8_6               usertty
iproute2                 nat_pvc8_7               xml
ipupdate.conf            nat_pvc9                 zebra.conf
# ls /userfs/bin/
auto_mount_dongle   hello               ripd
bftpd               igmpproxy           skbmgr
boa                 inetd               smbd
cfg_manager         iwpriv              smbpasswd
chat                mtd                 snmpd
dhcp6c              nmbd                tcapi
dhcp6s              ntfs-3g             tftpd
dhcrelay            ntpclient           tr69
dnsmasq             pppoe-relay         usb_auto_mount
ethphxcmd           radvd               vconfig
ez-ipupdate         restore_linos_info  zebra
# ls /usr/script/
AppFilterStop.sh              ipv6_filter_forward_start.sh
RebootScript                  ipv6_filter_forward_stop.sh
UrlFilterStop.sh              ipv6rd_start.sh
acl_stop.sh                   lanAlias_start.sh
before_tr069_download.sh      lanAlias_stop.sh
before_web_upgrade.sh         nat_start.sh
br_conf.sh                    nat_stop.sh
ddns.sh                       ntpclient.sh
ddns_run.sh                   ppp_start.sh
dhcp6c_script                 restart_boa.sh
dmz.sh                        samba.sh
dongle_dial_off.sh            samba_add_dir.sh
dongle_dial_on.sh             settime.sh
ether_mac.sh                  spi_fw_start.sh
filter_forward_start.sh       spi_fw_stop.sh
filter_forward_stop.sh        udhcpc.sh
fw_start.sh                   udhcpc_nodef.sh
fw_stop.sh                    upgrade_firmware.sh
getnow.sh                     urlfilter_start.sh
ipaddr_mapping.sh             urlfilter_stop.sh
ipfilter.sh                   vserver.sh
ipfilter_start.sh             wan_start.sh
ipfilter_stop.sh              wan_start_ipv4.sh
ipmacfilter_stop.sh           wan_start_ipv6.sh
ipv6_acl_stop.sh              wan_stop.sh
# mount
/dev/mtdblock3 on / type squashfs (ro)
proc on /proc type proc (rw)
ramfs on /tmp type ramfs (rw)
devpts on /dev/pts type devpts (rw)
usbfs on /proc/bus/usb type usbfs (rw)
# cat /proc/mtd 
dev:    size   erasesize  name
mtd0: 00010000 00010000 "bootloader"
mtd1: 00010000 00010000 "romfile"
mtd2: 000e9560 00010000 "kernel"
mtd3: 004cf000 00010000 "rootfs"
mtd4: 007a0000 00010000 "tclinux"
mtd5: 00040000 00010000 "reservearea"

Some notes on what’s going on:

  • The CPU is TrendChip 3162U. Looks like there are a lot of products that utilize this CPU and may use the TrendChip firmware.
  • It has 32MB of memory.
  • Looks like it has 16MB of flash.
  • The rootfs is a standard mips uclibc based on busybox.
  • The /etc directory is symlinked to /tmp which is a tmpfs.
  • The /etc directory is created mostly by scripts living at /usr/script directory.
  • The scripts are called by an executable named /userfs/bin/cfg_manager.
  • The WEB GUI lives in /boaroot.
  • The WEB GUI breaks out to cfg_manager via a socket interface. Not so sure about that.
  • USB sticks are mounted under /tmp/mnt/usb1_1 and are automatically exported via samba. Question: Is it possible via a USB hub to mount multiple disks? That would be cool to actually convert a modem to a NAS.
  • The flash is partitioned and looks like that some parts of it map directly to the tclinux.bin firmware image.

Reverse Engineering – binwalk

Let’s start with firmware 1.07 named tclinux.bin. Note the the name tclinux.bin is checked by the firmware during update and it is quite possible that the modem will refuse to update its firmware if the file doesn’t have that name.

#apt-get install binwalk
$binwalk tclinux.bin
DECIMAL HEXADECIMAL DESCRIPTION
--------------------------------------------------------------------------------
256 0x100 LZMA compressed data, properties: 0x5D, dictionary size: 8388608 bytes, uncompressed size: 3232020 bytes
955744 0xE9560 Squashfs filesystem, little endian, version 3.0, size: 5036741 bytes, 986 inodes, blocksize: 65536 bytes, created: Tue Feb 11 09:50:54 2014

So the first 256 bytes is the header and then something else and much later at 0xE9560 starts a squashfs. Let’s dig a bit more.

$binwalk -e tclinux.bin
$ls _tclinux.bin.extracted/
100 100.7z _100.extracted E9560 E9560.squashfs
$cd _tclinux.bin.extracted
$binwalk 100
DECIMAL HEXADECIMAL DESCRIPTION
--------------------------------------------------------------------------------
1430825 0x15D529 LZMA compressed data, properties: 0xD0, dictionary size: 131072 bytes, uncompressed size: 277750168 bytes
2646072 0x286038 Linux kernel version "2.6.22.15 (root@mbjsbbcf01) (gcc version 3.4.6) #1 Tue Feb 11 1c version 3.4.6) #1 Tue Feb 11 10:17:49 CST 2014"

So the firmware image looks like this

  • 0-0x100 Header
  • secondary bootloader (Couldn’t figure which was it)
  • Linux kernel + initrd (Not sure which order)
  • 0x09560 squashfs
  • padding to 4K

The header has the following fields

  • 0x00 magic number = 0x32524448
  • 0x04 magic device (or header size – not sure) = 0x100
  • 0x08 tclinux size = actual file size in bytes with header included
  • 0x0C tclinux checsum = CRC – XOR checksum see below how to calculate
  • 0x10 firmware version string = “7.0.1.0\n” in my case
  • 0x30 a newline = “\n”
  • 0x50 squashfs offset = 0x9560 in my case
  • 0x54 squashfs size = size of squashfs size as reported by binwalk 5038080 bytes padded to 4096 (0x1000) sector 5038080 (0x4CE000)
  • 0x5C model string = “3 6035 122 74\n” in my case

The program tcrevenge can be used to check an existing firmware file or calculate the checksum and generate a proper header for a new one.

Question: How to compare the live system with the firmware image?

Answer: We can put a usb stick to the modem (sometime requires reboot with the usb stick inside the jack) and use samba to copy files around.

for i in 0 1 2 3 4 5; do echo cat /dev/mtd$i > /tmp/mnt/usb1_1/p$i; done;

Notes:

  • p0 (partition 0) is 64k has the primary bootloader. Running strings against it is instructive indeed. It includes a minimal web server and it should be (never done it) possible to recover the modem from a bad firmware image. That means it must have the same CRC algorithm with the normal software for uploading firmware. The contents of this partition do not change with a firmware update.
  • p1 is the configuration file as saved by the WEB interface. For some reason it is called romfile.
  • p2 is the secondary bootloader and probably the kernel and some initrd image. The contents of the partition are exact match with the firmware image tclinux.bin (header included) up to the squashfs image as extracted by binwalk above.
  • p3 is the squashfs starting at 0x9560 of the tclinux.bin.
  • p4 holds the tclinux.bin verbatim so the primary bootloader can recover the modem
  • p5 is a reserved partition

Question: is it possible to modify the contents of the root (squashfs) filesystem?

Answer: We will need firmware-mod-kit in order to cope with the unusual LZMA compression and the older version number.

$git clone https://code.google.com/p/firmware-mod-kit/

Follow the instructions and build the firmware-mod-kit utilities. To uncompress and extract the filesystem you will need root user capabilities in order to create the device nodes and other weird files.

$sudo ../firmware-mod-kit/src/squashfs-3.0/unsquashfs-lzma E9560.squashfs

created 731 files
created 115 directories
created 91 symlinks
created 48 devices
created 0 fifos
$ls
E9560.squashfs squashfs-root

After making modifications to the root filesystem. Here is how to pack it up again.

rm E9560.sq; ../firmware-mod-kit/src/squashfs-3.0/mksquashfs-lzma squashfs-root squashfs-root.sq

The file squashfs-root.sq contains the modified squashfs root image.

Now we need to extract the kernel so we can assemble back the modified tclinux.bin. Here is a one line to do it:

$dd if=tclinux.bin.orig of=kernel skip=256 count=`binwalk ../tclinux.bin.orig | awk '/Squash/ {print $1 - 256;}'` bs=1

The tclinux.bin.orig in the above command line is the original firmware image.

The tcrevenge program will output the header and the necessary padding and a nice command line suggestion to create the new tclinux.bin.

$./tcrevenge -k kernel -s squashfs-root.sq -o header -p padding
Creating necessary squashfs paddingfile padding 1352
Magic number: 0x32524448 at 0x00
Magic device: 0x00000100 at 0x04
tclinux.bin size: 5993824 (0x005B7560) at 0x08
tclinux.bin checksum: 0xD4BEA4AA at 0x0C
Firmware version at 0x10: 7.0.1.0
squashfs offset: 955488 (0x000E9460) at 0x50
squashfs size: 5038080 (0x004CE000) at 0x54
Model at 0x5C: 3 6035 122 74
Writing header to header. Create image with
         cat header kernel squashfs-root.sq padding > tclinux.bin
$

Update 29/3/2015 15:30: The disassembly of the MIPS executables that led to the reverse engineering and the C reimplementation of the CRC algorithm in tcrevenge is the subject of another article.

Modifications

Now that we can build a new modified firmware at request let’s proceed with the actual modifications we would like to achieve.

DSL Line setup

That’s an easy one and it does not require firmware changes at all. The configuration file is called romfile.cfg. It is an XML file and has a section named Autoexec.

<Autoexec>
<Entry cmd1="w dmt2 db tlb 2b"
cmd2="wan ghs set multi_number 3 3" cmd3="wan dmt2 set largeD 2"
cmd4="w dmt eoc dyingasp off" cmd5="w dmt2 set lpr off"
cmd6="echo 1 &gt; /proc/tc3162/port_reverse"
cmd7="wan dmt2 set snrmoffset 4096 4096"/>
</Autoexec>

Note the extra cmd7 added by me manually. This is enough to boost modem sync up to 22 MBit/s in my case. I didn’t find any script in /usr/script that generated /etc/autoexec.sh but the  /userfs/bin/cfg_manager matches autoexec. So probably /etc/autoexec.sh is generated by the cfg_manager binary. Here is how /etc/autoexec.sh looks like:

# cat autoexec.sh 
w dmt2 db tlb 2b
wan ghs set multi_number 3 3
wan dmt2 set largeD 2
w dmt eoc dyingasp off
w dmt2 set lpr off
echo 1 > /proc/tc3162/port_reverse
wan dmt2 set snrmoffset 4096 4096

Note that you have to see that inside the modem via telnet since /etc/autoexec.sh is automatically generated on boot time and it is not available in the expanded squashfs partition.

Arp table setup for WAN WOL support

It took a bit of trial and error but finally I managed to guess the correct script to edit. It is not immediately obvious because scripts are being run by the mysterious cfg_manager binary. The right script is /usr/script/nat_start.sh and here is the patch.

diff -ur ../_tclinux.bin.extracted.orig/E9560/usr/script/nat_start.sh E9560/usr/script/nat_start.sh
--- ../_tclinux.bin.extracted.orig/E9560/usr/script/nat_start.sh        2014-02-11 04:50:45.000000000 +0200
+++ E9560/usr/script/nat_start.sh       2015-02-27 20:37:59.908163151 +0200
@@ -62,3 +62,5 @@
 #              /usr/script/ipaddr_mapping.sh add $i $j
 #      fi
 #done
+
+/sbin/arp -s 192.168.1.254 FF:FF:FF:FF:FF:FF

WINS support

This one was easier. The /usr/script/samba.sh is generating the /etc/samba/smb.conf. Here is the patch that enables WINS support.

diff -ur ../_tclinux.bin.extracted.orig/E9560/usr/script/samba.sh E9560/usr/script/samba.sh
--- ../_tclinux.bin.extracted.orig/E9560/usr/script/samba.sh    2015-02-06 23:18:17.953887683 +0200
+++ E9560/usr/script/samba.sh   2015-02-06 22:49:31.920892757 +0200
@@ -17,6 +17,7 @@
 netbios name = $NETBIOS_NAME
 server string = Samba Server
 workgroup = $WORKGROUP
+wins support = yes
 security = user
 guest account = $GUEST
 log file = /var/log.samba

To be continued…

What is missing now is adding support for namecheap DDNS which belongs to another article.